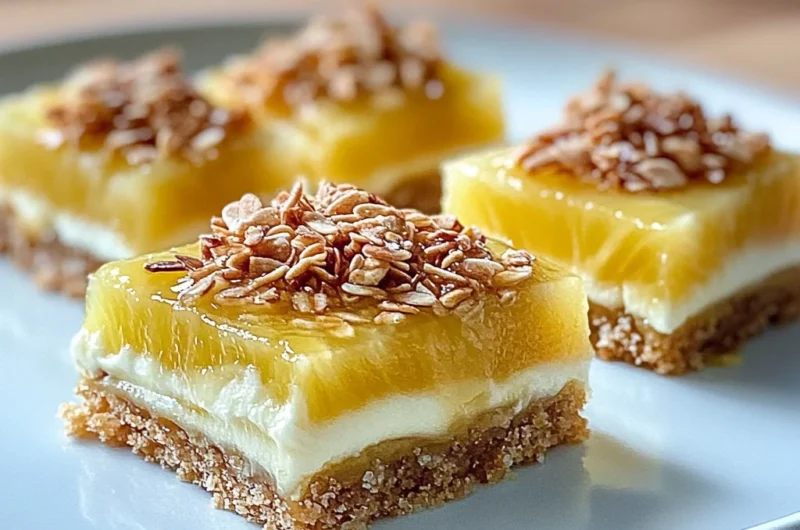
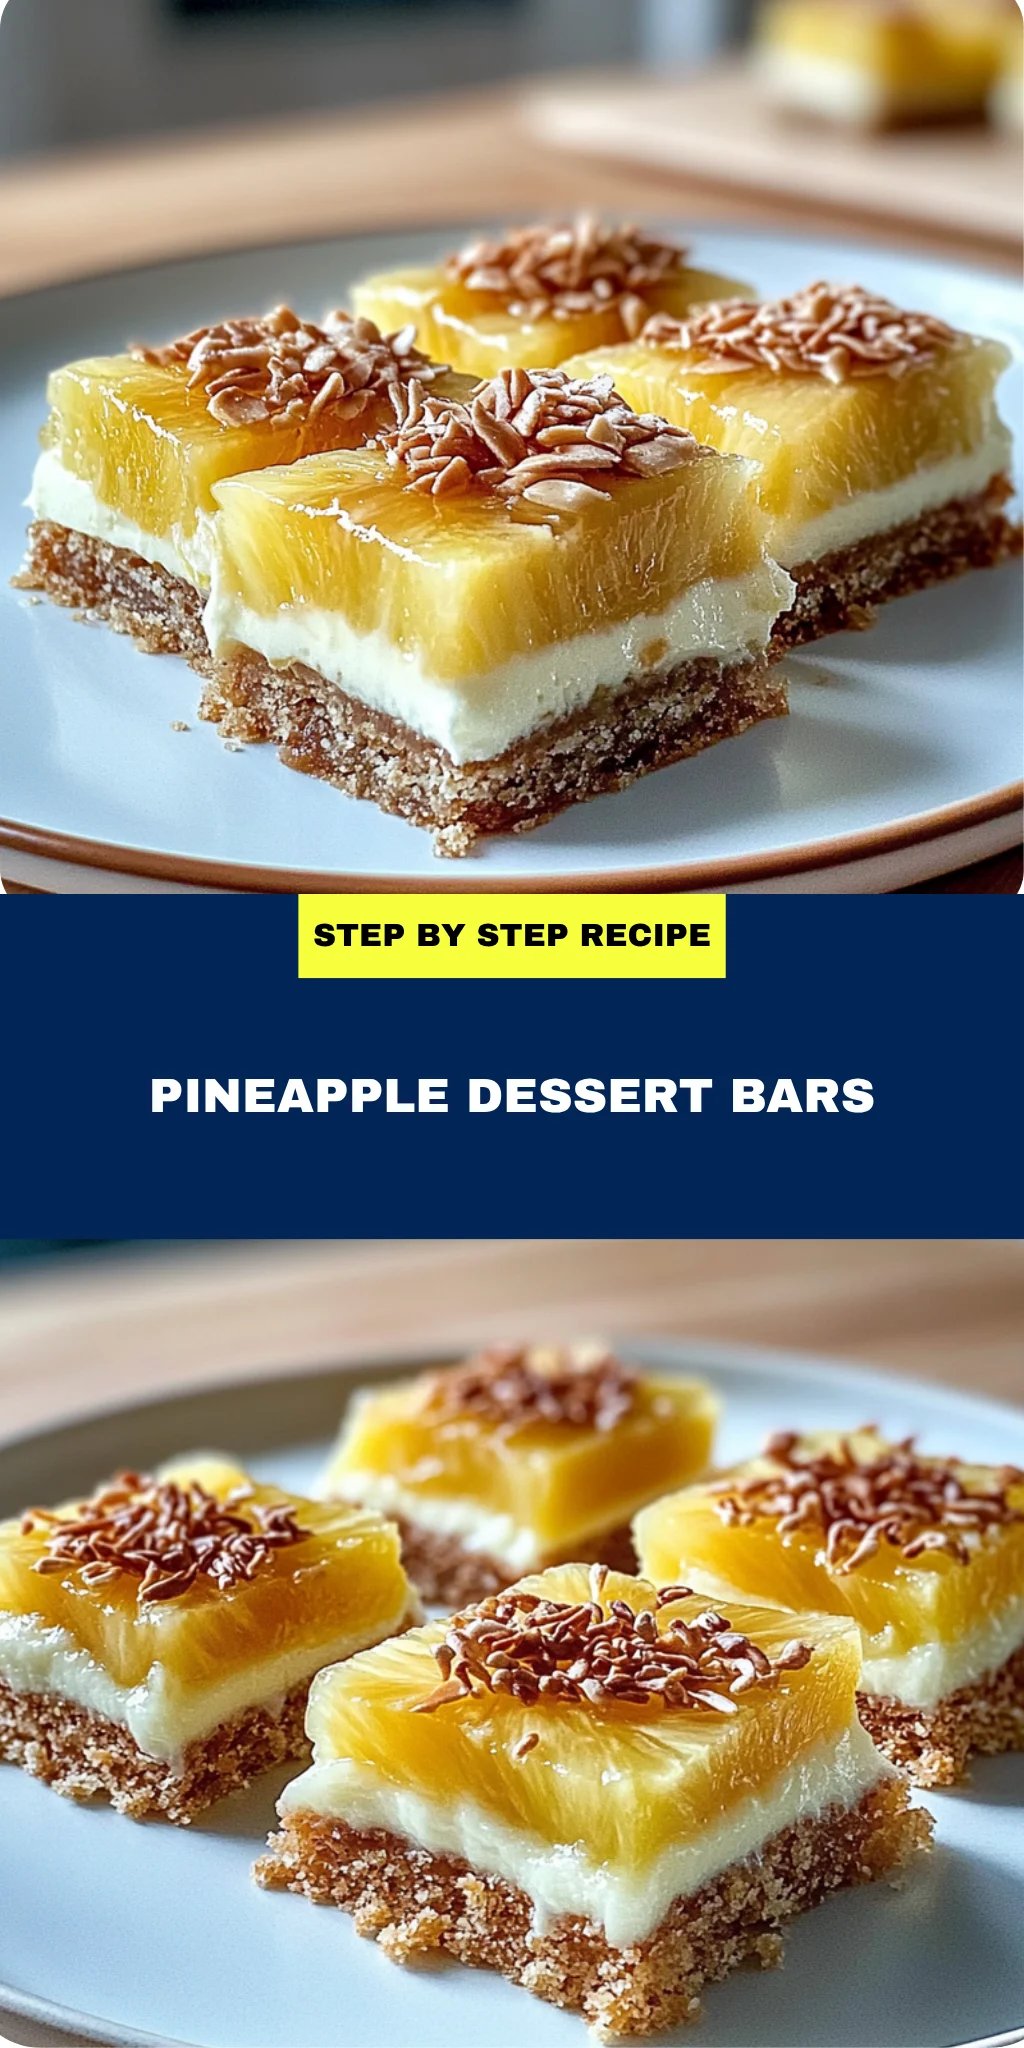
Picture sinking your teeth into a luscious Pineapple Dessert Bar, where the sweet and tangy flavors dance on your palate, igniting a symphony of delight. The buttery crust crumbles with each bite, while the creamy filling envelops your senses in a tropical embrace that makes you feel like you’re lounging on a sun-soaked beach.
I’ll never forget the first time I made these bars for a family gathering; the way everyone fought over the last piece was priceless! Perfect for summer picnics or cozy get-togethers, these treats promise an unforgettable flavor experience that will leave you craving more. Trust me, one bite of these delightful dessert bars and you’ll be transported to paradise.
Why Will You Keep Making Pineapple Dessert Bars?
Delightful layers of a buttery crust and creamy filling create an irresistible treat that everyone will adore. Quick and easy to prepare, these bars only require 15 minutes of prep time, making them perfect for busy days. Tropical flavor shines through with sweet, tangy pineapple, delivering a burst of sunshine in every bite. Versatile enough for any occasion, they work beautifully as a dessert, snack, or potluck contribution. Plus, the crowd-pleasing nature of these bars means they’ll disappear before you know it!
Pineapple Dessert Bars Ingredients
For the Crust
- 1 cup all-purpose flour – This forms the base of your bars, providing structure and a delightful texture.
- 1/4 cup granulated sugar – Adds just the right amount of sweetness to complement the buttery flavor.
- 1/2 cup unsalted butter (softened) – Ensures a rich, tender crust; be sure it’s softened for easy mixing.
- 1/4 teaspoon salt – Balances the sweetness and enhances all the flavors in your crust.
For the Filling
- 1 cup crushed pineapple (drained) – Infuses your bars with a refreshing tropical flavor that’s both sweet and tangy.
- 1/2 cup granulated sugar – Sweetens the filling perfectly while working harmoniously with the tartness of pineapple.
- 2 large eggs – Binds the filling together and adds richness to each bite of these Pineapple Dessert Bars.
- 1/4 cup all-purpose flour – Helps to thicken the filling, giving it that creamy yet firm texture you’ll love.
- 1 teaspoon vanilla extract – Introduces a warm, aromatic note that beautifully complements the pineapple flavor.
- 1/4 teaspoon baking powder – Provides a slight lift to your filling, making it light and delightful!
How to Make Pineapple Dessert Bars
1. Preheat the oven to 350°F (175°C). In a mixing bowl, combine 1 cup of all-purpose flour, 1/4 cup granulated sugar, 1/2 cup softened unsalted butter, and 1/4 teaspoon salt. Mix until the texture is crumbly and buttery.
2. Press the mixture firmly into the bottom of a greased 9×9 inch baking pan. Aim for an even layer that will create a solid base for your bars.
3. Bake for 10 minutes, then remove from the oven. The crust should be lightly golden and just starting to set.
For the Filling:
4. Whisk together 2 large eggs and 1/2 cup granulated sugar in another bowl until well combined and fluffy. This will give your filling a lovely sweetness.
5. Add in 1 cup of drained crushed pineapple, 1/4 cup all-purpose flour, 1 teaspoon vanilla extract, and 1/4 teaspoon baking powder. Mix until smooth and well incorporated — it should be creamy and inviting!
6. Pour the filling over the pre-baked crust and spread it evenly across the surface. It will look bright and luscious against the golden crust!
7. Return to the oven and bake for an additional 15-20 minutes, or until the filling is set in the center. You’ll know it’s done when it has a slight jiggle but not too much.
8. Allow to cool before slicing into bars. Once cooled, these delightful Pineapple Dessert Bars are ready to be shared with family and friends.
Optional: Dust with powdered sugar for an elegant touch.
Exact quantities are listed in the recipe card below.
Expert Tips
- Butter Temperature: Use softened butter for the crust to ensure a smooth, crumbly texture that binds well without being too greasy.
- Drain Pineapple Well: Make sure to thoroughly drain the crushed pineapple to avoid a soggy filling, which can disrupt the balance of your Pineapple Dessert Bars.
- Avoid Overmixing: When combining the filling ingredients, mix just until smooth. Overmixing can lead to a denser texture and less fluffy bars.
- Cooling Time: Allow the bars to cool completely before slicing. This helps them set properly and makes cutting easier without crumbling.
- Watch Baking Time: Keep an eye on the filling during baking; it should be set but still slightly jiggly in the center when you take it out of the oven.
How to Store and Freeze Pineapple Dessert Bars
- Room Temperature: Keep your Pineapple Dessert Bars in an airtight container for up to 2 days. This helps maintain their delicious texture without drying out.
- Fridge: For longer freshness, store the bars in the refrigerator in a sealed container for up to 5 days. Just let them come to room temperature before serving for the best flavor.
- Freezer: Wrap individual bars tightly in plastic wrap and then place them in a freezer-safe bag. They can be frozen for up to 3 months, allowing you to enjoy them whenever a craving strikes!
- Reheating: To reheat, simply pop the bars in the microwave for about 10-15 seconds. Enjoy your sweet treat warm or at room temperature!
Pineapple Dessert Bars Your Way
Feel free to add your personal touch to these delightful bars and create a version that sings to your taste buds!
- Gluten-Free: Swap the all-purpose flour with a gluten-free blend for a deliciously inclusive treat. You won’t miss the traditional flour at all; the flavor remains vibrant and sweet!
- Coconut Twist: Replace half of the butter with coconut oil and add shredded coconut to the crust. This will introduce a tropical flair, enhancing the pineapple’s natural sweetness.
- Brown Sugar: Use brown sugar instead of granulated sugar in both the crust and filling for a deeper, caramel-like flavor. The result is a beautifully rich dessert that will have everyone asking for seconds!
- Nutty Crunch: Add 1/2 cup of finely chopped nuts like pecans or walnuts to the crust for an extra layer of texture. The crunch will perfectly complement the creamy filling, creating a delightful contrast in every bite.
- Lemon Zest: Incorporate 1 teaspoon of lemon zest into the filling for a refreshing citrusy brightness. This subtle addition elevates the tanginess of the pineapple, making each bite even more tantalizing.
- Spicy Kick: For those who enjoy some heat, mix in a pinch of cayenne pepper into the filling. It adds an unexpected warmth, perfectly balancing out the sweetness.
- Berry Burst: Fold in 1/2 cup of fresh blueberries or raspberries into the filling before baking. This fruity addition brings another layer of flavor and beautiful color to your dessert bars!
Make Ahead Options
Preparing Pineapple Dessert Bars is a delightful way to simplify your meal prep, making them the ideal treat for any occasion. You can easily prepare the crust in advance by combining 1 cup of all-purpose flour, 1/4 cup of granulated sugar, 1/2 cup of softened unsalted butter, and 1/4 teaspoon of salt until crumbly. Press it into a greased 9×9 inch baking pan and pre-bake for 10 minutes. For the filling, you can whisk together the eggs and sugar up to 24 hours ahead, then add the drained crushed pineapple, remaining flour, vanilla extract, and baking powder just before baking. This will keep your Pineapple Dessert Bars fresh and flavorful for up to 3 days when stored in an airtight container in the refrigerator. When you’re ready to serve, simply pour the filling over the crust and bake as directed—your family will be amazed at how effortlessly delicious these bars are!
Pineapple Dessert Bars Recipe FAQs
What type of flour is best for the crust?
All-purpose flour works wonderfully for this recipe, providing the right texture for a buttery crust. If you’re looking for a gluten-free option, consider using a 1: 1 gluten-free baking blend, which should yield similar results.
How should I store leftover pineapple dessert bars?
Store any leftover bars in an airtight container in the refrigerator. They’ll keep fresh for about 3-4 days. Just remember to let them cool completely before sealing them up!
Can I freeze these pineapple dessert bars?
Absolutely! These delightful bars freeze well. Just wrap them tightly in plastic wrap and place them in a freezer-safe container. They can be frozen for up to 2 months. Thaw overnight in the fridge before serving.
What if my filling doesn’t set properly?
If your filling isn’t setting after the recommended baking time of 15-20 minutes, it may need a few extra minutes in the oven. You’re looking for a slightly firm texture that doesn’t jiggle too much when you gently shake the pan. Just be careful not to overbake, as it can dry out.
Can I use fresh pineapple instead of crushed?
Yes! Fresh pineapple can be used, but make sure to finely chop it and drain excess juice to avoid making your filling too watery. This will help maintain the perfect creamy consistency!
How many servings does this recipe yield?
This recipe yields about 4 generous servings. If you’re hosting a gathering or want to enjoy them longer, feel free to double the recipe and bake it in a larger pan. Just adjust your baking time as needed!