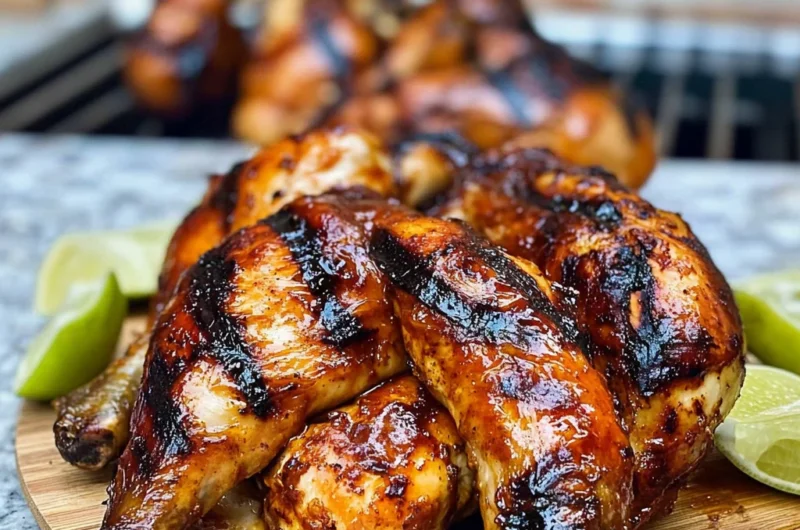
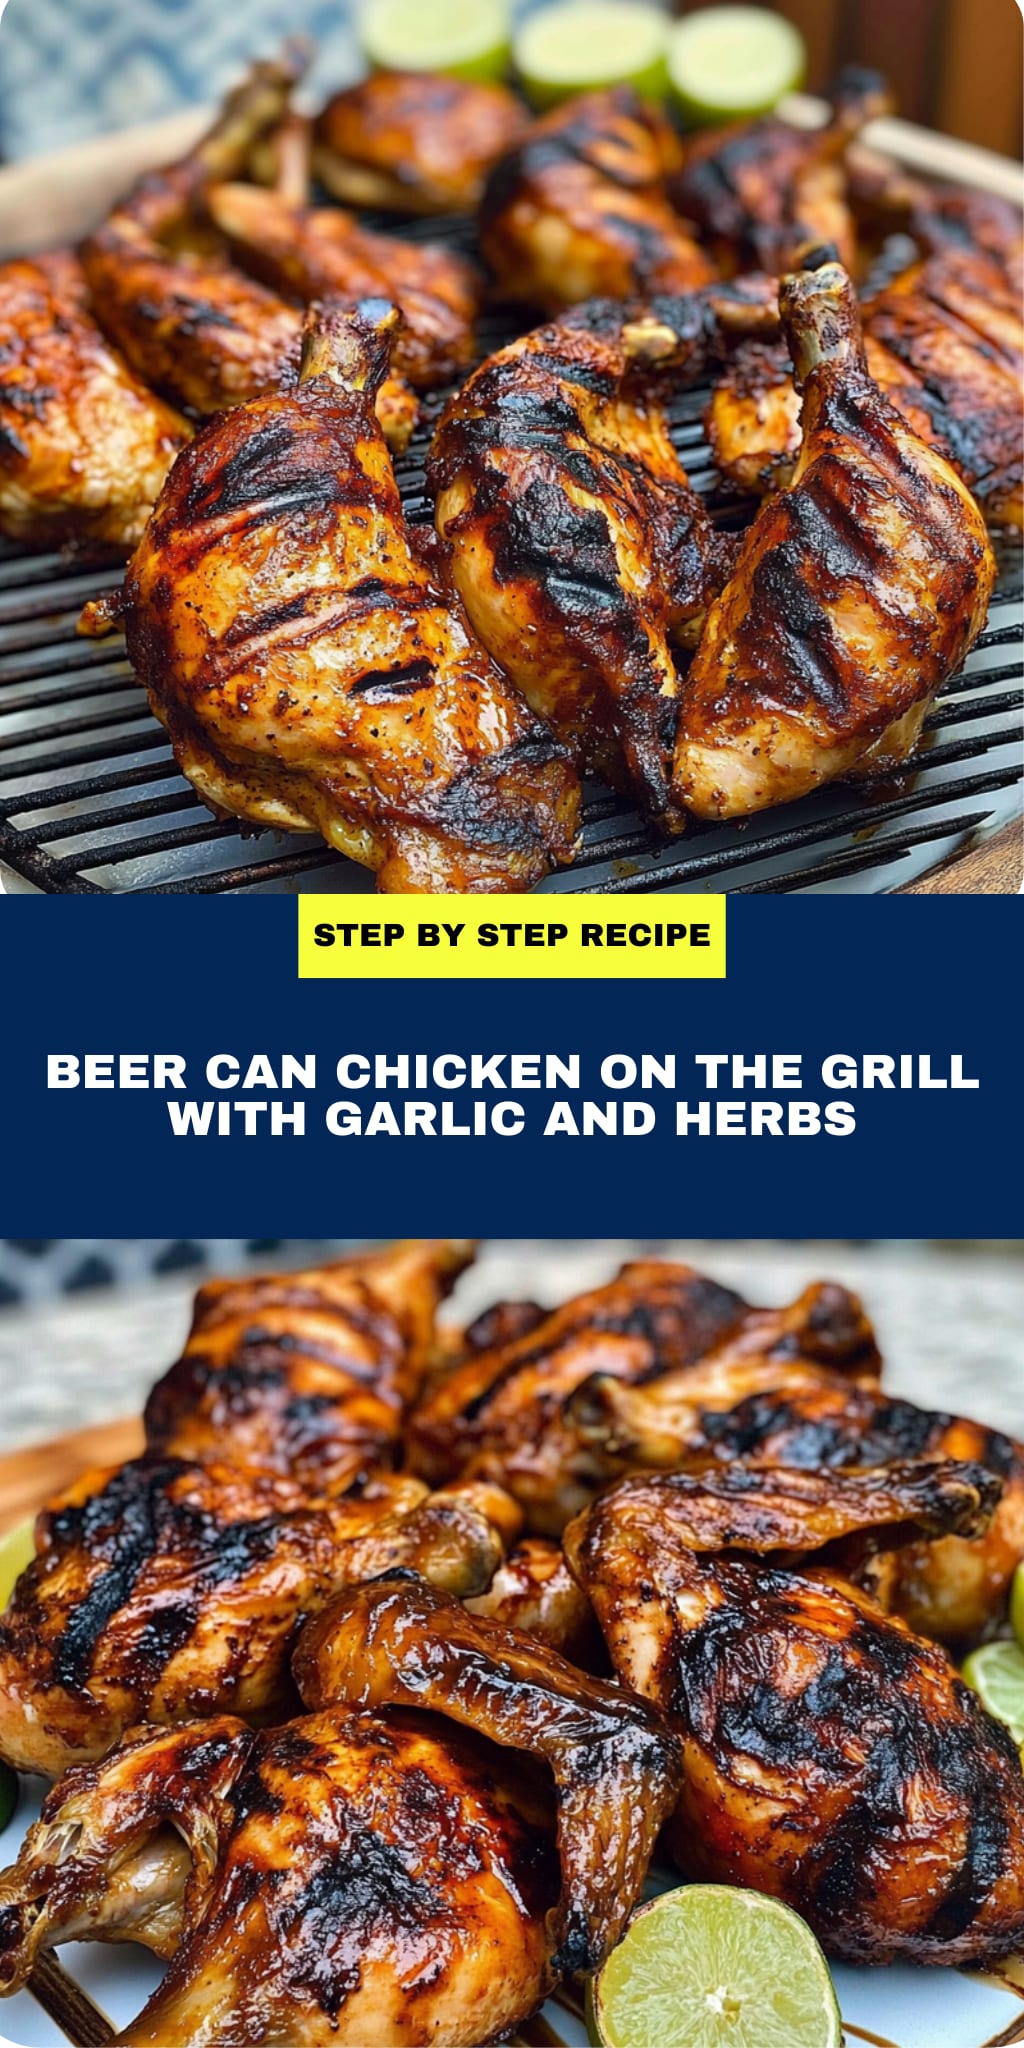
Imagine the sizzling sound of a perfectly grilled chicken, its skin crisping to a golden brown while the aroma of herbs and spices wafts through the air, tickling your senses. Beer can chicken on the grill is not just a dish; it’s a celebration of flavors that invites laughter, good company, and memories around the backyard barbecue.
Picture this: friends gathered, drinks in hand, laughter echoing as you unveil your masterpiece. The first bite reveals juicy tenderness infused with that secret beer flavor—it’s an experience you won’t soon forget. Whether it’s a summer cookout or a casual weeknight dinner, this dish promises to elevate any occasion and leave everyone asking for seconds.
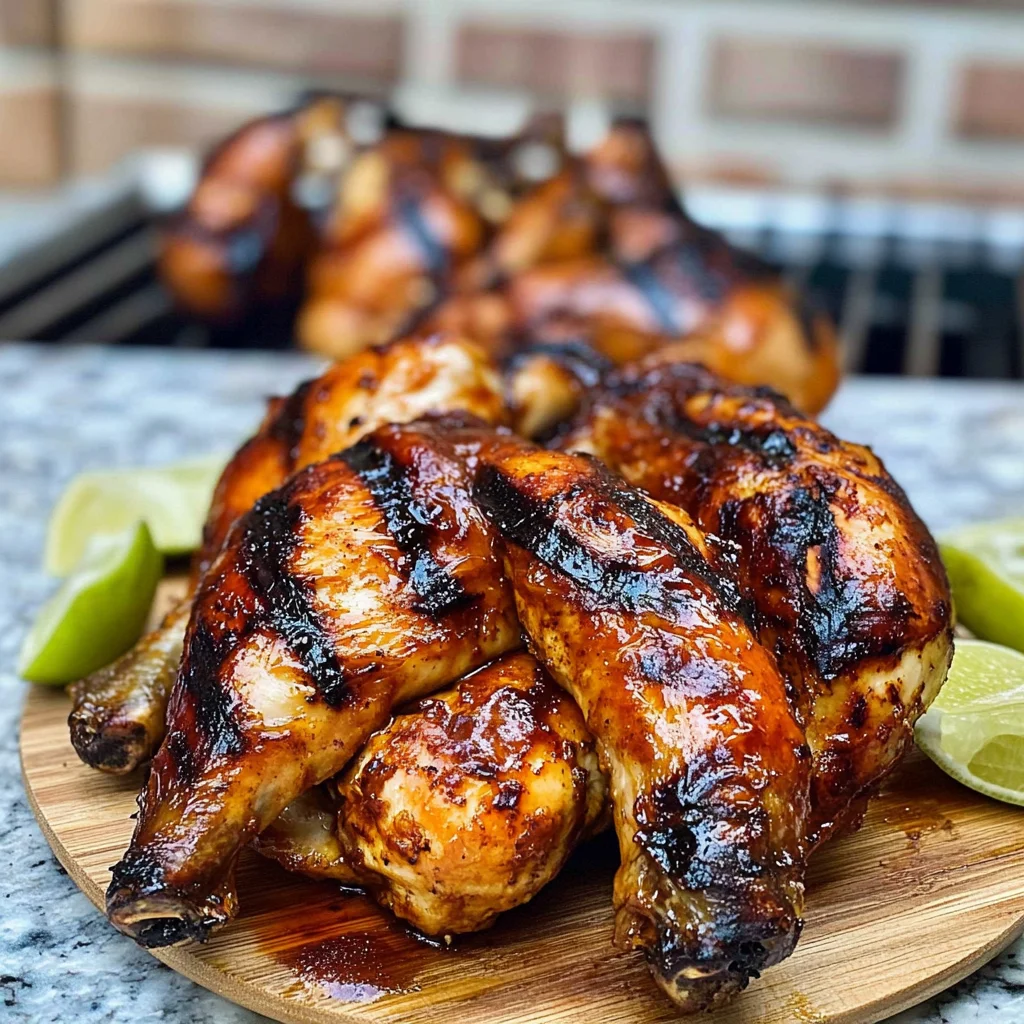
Why Is beer can chicken on the grill So Irresistibly Good?
Juicy perfection: The beer infuses the chicken with moisture, ensuring every bite is succulent and flavorful.
Bold flavors: A blend of paprika, garlic, and onion powder transforms simple chicken into a savory masterpiece that will have everyone asking for seconds.
Simple prep: With just 15 minutes of hands-on time, you can let the grill do the work while you relax and enjoy your day.
Crowd-pleaser: This dish impresses at gatherings, bringing friends and family together over mouthwatering aromas and delicious flavors.
Versatile choice: Customize your beer selection and spices to match your taste preferences, making it a fun dish for any occasion!
beer can chicken on the grill Ingredients
For the Chicken
- 1 whole whole chicken (about 4-5 pounds) – Opt for an organic bird for the best flavor and juiciness.
For the Beer
- 1 can lager or ale (your choice of beer) – The beer steams inside the chicken, keeping it moist and adding a delightful flavor.
For the Seasoning
- 2 tablespoons olive oil – This helps the seasoning adhere to the chicken while adding richness.
- 1 tablespoon paprika – Provides a warm color and a subtle smokiness to the dish.
- 1 tablespoon garlic powder – Adds a robust depth of flavor that complements the chicken perfectly.
- 1 tablespoon onion powder – Enhances the savory taste, making each bite irresistible.
- 1 teaspoon salt (to taste) – Essential for enhancing overall flavor; adjust based on preference.
- 1 teaspoon black pepper (to taste) – Adds a gentle kick; feel free to add more for extra heat.
- 1 teaspoon cayenne pepper (optional for heat) – For those who love a spicy kick, this is a great optional addition.
How to Make beer can chicken on the grill
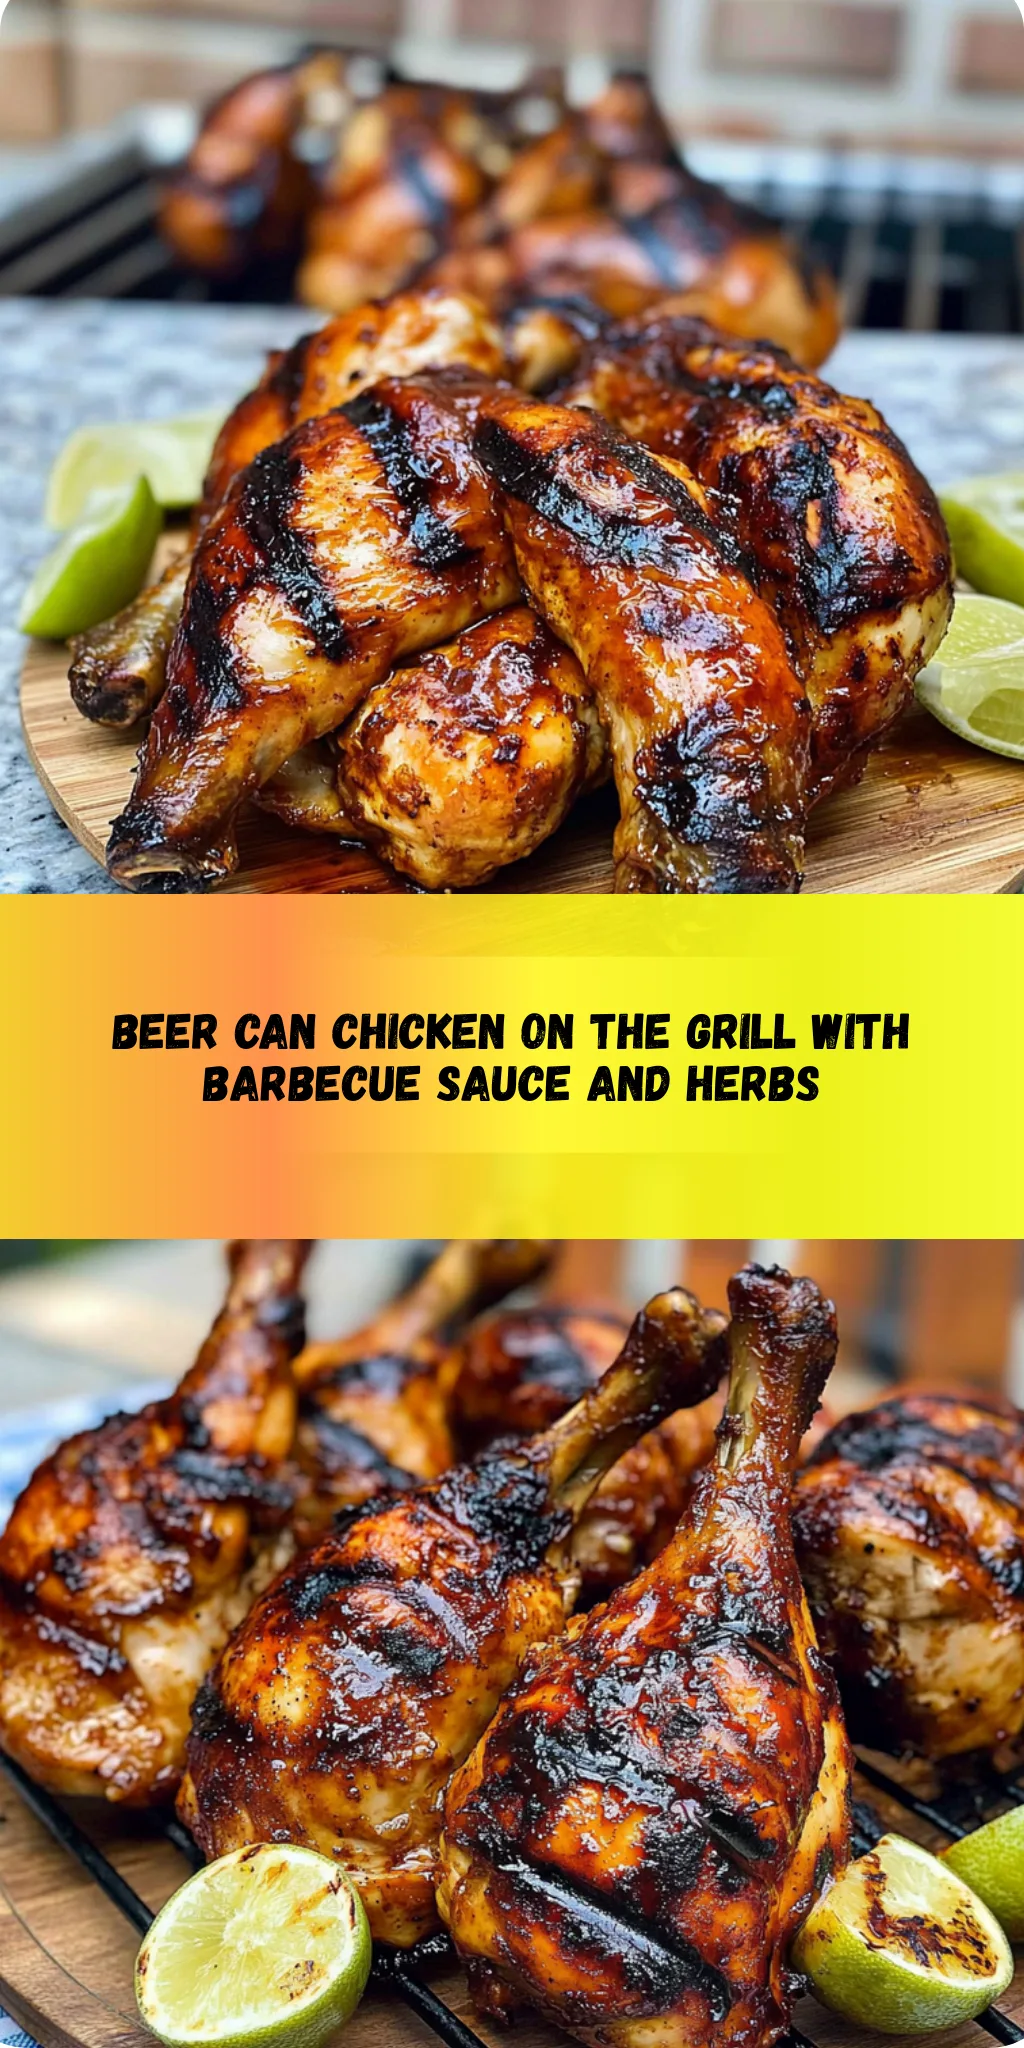
1. Preheat the grill to medium heat (about 350°F). This step is crucial for achieving that perfect, juicy finish on your chicken. The right temperature ensures even cooking and a beautiful golden skin.
2. Rinse the chicken under cold water and pat dry with paper towels. This helps remove any residual juices and ensures your seasoning sticks beautifully to the skin for maximum flavor.
3. Rub the olive oil all over the chicken, then season generously with paprika, garlic powder, onion powder, salt, black pepper, and cayenne pepper. Each spice adds layers of flavor that will transform your 4-5 pound bird into a succulent delight!
4. Open the can of beer and take a few sips to make room for steam. Choosing your favorite lager or ale will infuse your chicken with delightful moisture as it cooks—trust me; it’s worth it!
5. Add additional spices or herbs to the beer can for extra flavor if desired. A sprig of rosemary or thyme works wonders and brings an aromatic touch to your grilled masterpiece.
6. Place the beer can in the center of the grill grate. This will serve as a sturdy base for your chicken, allowing it to cook evenly while standing upright.
7. Lower the chicken carefully onto the beer can, so it stands upright. This unique position allows steam from the beer to penetrate every inch of meat, ensuring juicy results.
8. Close the grill lid and cook for about 1 hour, or until the internal temperature reaches 165°F. Keep an eye on it during this time—the sizzling sound will let you know magic is happening inside!
9. Rotate the chicken occasionally for even cooking. This step is key to achieving that perfectly grilled exterior while maintaining moistness within.
10. Remove the chicken from the grill using tongs once cooked. Exercise caution as both chicken and beer can will be hot—safety first!
11. Let it rest for 10 minutes before carving, allowing those flavorful juices to redistribute throughout the meat for optimal tenderness.
12. Serve with your favorite sides, like roasted veggies or a fresh salad—these pair beautifully with your flavorful grilled creation!
Optional: For an extra touch, serve with a wedge of lemon or lime to brighten up each bite.
Exact quantities are listed in the recipe card below.
Pro Tips for beer can chicken on the grill
- Chicken Preparation: Ensure the chicken is thoroughly dried before seasoning to help the spices adhere better and create a crispy skin.
- Beer Choice: Select a beer that you enjoy drinking; lagers and ales work well, but avoid overly hoppy varieties as they can overpower the chicken’s flavor.
- Season Generously: Don’t skimp on the seasoning! A generous coating of paprika, garlic, and onion powder enhances the flavor profile significantly.
- Monitor Temperature: Use a meat thermometer to check that the internal temperature reaches 165°F; this ensures juicy, perfectly cooked chicken every time.
- Resting Time: Allow the chicken to rest for at least 10 minutes after grilling; this helps redistribute juices for maximum tenderness.
- Avoid Overcooking: Keep an eye on your chicken while grilling. Rotate it occasionally to prevent burning and ensure even cooking during your beer can chicken on the grill experience.
How to Store and Freeze beer can chicken on the grill
- Fridge: Store leftover beer can chicken in an airtight container for up to 3 days to maintain moisture and flavor.
- Freezer: If you want to keep it longer, wrap the chicken tightly in plastic wrap and then foil before freezing for up to 3 months.
- Reheating: To reheat, place the chicken in a preheated oven at 350°F (175°C) for about 20-25 minutes, or until heated through.
- Serving Tip: For best results, enjoy your beer can chicken on the grill fresh, but if you have leftovers, these storage tips ensure delicious meals later!
beer can chicken on the grill Variations
Feel free to get creative with this recipe and make it truly your own!
- Citrus Zing: Swap the beer with a can of lemon-lime soda for a bright, refreshing flavor. This twist adds a delightful citrusy note that pairs beautifully with grilled chicken, enhancing its juiciness and overall taste.
- Herb Infusion: Use fresh herbs like rosemary or thyme instead of the seasoning blend. Simply tuck a few sprigs inside the cavity before grilling. The aromatic herbs will infuse the chicken with a fragrant flavor that elevates every bite.
- Spicy Kick: Add crushed red pepper flakes to your seasoning mix for an extra layer of heat. This variation not only bumps up the spice level but also gives a vibrant color to your chicken crust, making it even more enticing.
- Sweet & Savory: Brush honey or maple syrup over the chicken during grilling for a sweet glaze. This caramelization creates a beautiful crust while balancing savory flavors, resulting in an irresistible dish that will have everyone reaching for seconds.
- Smoky Flavor: Incorporate smoked paprika instead of regular paprika for a deeper, smoky taste. This simple swap transforms your grilled chicken into a barbecue favorite, evoking memories of summer cookouts and family gatherings.
- Beer Variety: Experiment with different types of beer, like stout or wheat beer, to change the flavor profile. Each beer brings its unique characteristics to the dish, allowing you to discover new favorites and keep mealtime exciting.
- Garlic Lovers: Increase garlic powder to 2 tablespoons for an extra punch of garlicky goodness. A bolder garlic flavor makes this dish irresistible, especially when paired with fresh sides like grilled vegetables or salads.
Make Ahead Options
This beer can chicken on the grill is not only a showstopper but also perfect for meal prep, allowing you to savor its deliciousness with minimal last-minute effort. You can season the chicken up to 24 hours in advance by rubbing it with olive oil, paprika, garlic powder, onion powder, salt, black pepper, and cayenne pepper. Additionally, you can open the beer can and flavor it with your favorite herbs or spices a day ahead as well. Just remember to keep the seasoned chicken in the refrigerator until you’re ready to grill. On cooking day, simply preheat your grill to medium heat, insert the beer can into the chicken as instructed, and let it cook for about an hour until it reaches 165°F. This way, you get all the mouthwatering flavors of beer can chicken on the grill without the last-minute rush!
beer can chicken on the grill Recipe FAQs
What type of beer is best for beer can chicken?
Choosing a lager or ale works best for this recipe, but feel free to experiment with your favorite craft beers! A light lager typically lends a subtle taste, while a hoppy ale can add a nice depth of flavor. Just remember, the more flavorful the beer, the more it enhances the chicken.
How can I ensure my chicken stays juicy while grilling?
To keep your chicken juicy, make sure to cook it at a medium heat of about 350°F and avoid opening the grill lid too often. This allows the steam from the beer to keep the meat moist. Additionally, letting the chicken rest for 10 minutes after cooking helps redistribute those delicious juices before carving.
Can I use different seasonings for the chicken?
Absolutely! While paprika, garlic powder, and onion powder are fantastic choices, you can customize your seasoning blend based on personal preferences. Consider adding dried herbs like thyme or rosemary, or even a barbecue rub for extra flavor. Just stick to about 3-4 tablespoons total seasoning for optimal coverage.
What should I do if my chicken is not cooking evenly?
If you notice uneven cooking, try rotating the chicken every 15 minutes during grilling. This ensures all sides get equal exposure to heat. If your grill has hot spots, it might also help to move the chicken around slightly within those areas for more consistent cooking.
How do I store leftovers from this beer can chicken?
Leftover grilled chicken can be stored in an airtight container in the refrigerator for up to 3-4 days. Make sure it’s completely cooled before sealing it up. For longer storage, you can freeze pieces of cooked chicken wrapped tightly in plastic wrap or aluminum foil for up to three months—perfect for quick meals later!
Is this recipe suitable for dietary restrictions?
This beer can chicken recipe is naturally gluten-free if you choose a gluten-free beer option. It’s also dairy-free and full of protein! However, be cautious with your seasonings if you’re managing sodium intake; you can always reduce or omit salt according to your dietary needs.
Beer Can Chicken on the Grill
Ingredients
Method
- Preheat the grill to medium heat (about 350°F).
- Rinse the chicken under cold water and pat dry with paper towels.
- Rub the olive oil all over the chicken, then season generously with paprika, garlic powder, onion powder, salt, black pepper, and cayenne pepper.
- Open the can of beer and take a few sips to make room for steam.
- If desired, add additional spices or herbs to the beer can for extra flavor.
- Place the beer can in the center of the grill grate.
- Carefully lower the chicken onto the beer can, so it stands upright.
- Close the grill lid and cook for about 1 hour, or until the internal temperature reaches 165°F.
- Rotate the chicken occasionally for even cooking.
- Once cooked, carefully remove the chicken from the grill using tongs.
- Let it rest for 10 minutes before carving.
- Serve with your favorite sides.